How to Build a Job Application Tracker 2026 (Free Templates)
Build a job application tracker in Google Sheets or Notion in 15 minutes. Get the 10 essential columns, formulas, and a free template you can copy


Applying to dozens of roles without a system means losing track of which resume went where, missing follow-up windows, and applying to the same job twice. A job application tracker fixes all three, and you can build one in about fifteen minutes.
This guide walks you through the ten columns that matter, how to build the tracker in Google Sheets and in Notion step by step, and how to read your own data to find where your search is stalling. If you'd rather skip the build entirely, there's a free tool at the end that does it for you.
What Is a Job Application Tracker?
A job application tracker is a spreadsheet or database where each row represents one job application and records what you sent, where it stands, and what you need to do next.
That last part is what separates a tracker from a list. A list tells you where you applied. A tracker tells you what to do tomorrow.
One rule before you build anything: one row equals one role, not one company. If you're pursuing three positions at the same company, that's three rows. Combining them breaks your tracking the moment one advances and another gets rejected.
The 10 Columns Every Job Application Tracker Needs
Every job application tracker needs ten columns: Company, Job Title, Date Applied, Job URL, Status, Next Follow-Up, Contact Person, Resume Version, Salary Range, and Notes.
For the salary field, run the role through an expected salary calculator before you apply so you have a number to compare against.
Fields to Add if You're Applying at High Volume
Once the core ten are working and you're managing more than fifty active applications, these four earn their keep:
- Source — where you found the job (referral, LinkedIn, company career page, recruiter outreach). This is what lets you calculate which channels actually convert.
- Last Human Contact Date — track this separately from the status. ATS statuses like "Under Review" sit unchanged for weeks. A date when an actual person last spoke to you is more honest.
- Priority (High / Medium / Low) — prevents you from giving a long-shot cold apply the same prep time as a warm referral.
- Fit Evidence — one sentence on why this role is actually right for you. It sounds trivial. It's the single best defense against high-volume applying that inflates your row count without improving your odds.
One security note: don't store passwords in your tracker. Record the application portal name and the email address you used, then keep credentials in a password manager.
How to Build a Job Application Tracker in Google Sheets
To build a job application tracker in Google Sheets, create a blank spreadsheet, add the ten column headers, turn Status into a dropdown, apply conditional formatting by status, and add a summary dashboard at the top. The whole build takes about fifteen minutes.
Step 1: Create the Sheet and Add Headers
Open Google Sheets and click Blank spreadsheet. Name it something you'll recognize in your Drive, like "Job Search 2026."
In row 1, enter your ten headers across columns A through J:
Company | Job Title | Date Applied | Job URL | Status | Next Follow-Up | Contact Person | Resume Version | Salary Range | Notes
Then freeze the header row so it stays visible as you scroll: View → Freeze → 1 row.
Step 2: Turn Status into a Dropdown
Typing your status by hand guarantees inconsistency, and inconsistent values break every formula you're about to write. Use a dropdown instead.
Select column E (Status), then go to Data → Data validation → Add rule. Set the criteria to Dropdown and enter these seven values:
- Saved
- Applied
- Interviewing
- Assessment
- Offer
- Rejected
- Ghosted
Seven stages covers most searches. If you're in a longer process (academic roles, government positions, senior leadership), split Interviewing into named sub-stages.
Step 3: Color-Code Your Status Column
Color coding lets you read the state of your entire search in one glance rather than reading forty rows of text.
Select column E, then Format → Conditional formatting. Add a rule for each status using Text is exactly
Leave Saved unformatted so unapplied rows stand out as blank.
Step 4: Auto-Calculate Your Follow-Up Dates
Rather than deciding a follow-up date manually for every application, let the sheet set one automatically. Put this in cell F2 and drag it down:
=IF(E2="Applied", C2+14, "")
This sets a follow-up date fourteen days after the application date, but only for rows with "Applied" status. Rows in other stages stay blank so you can enter dates manually as interviews get scheduled.
Fourteen days matches the standard guidance of waiting one to two weeks before following up on an application, unless the employer gave you a specific timeline.
Step 5: Build the Dashboard
Insert three blank rows above your headers. This is your summary panel, and it's what turns a spreadsheet into something you'll actually open every morning.
In row 1, add these labels and formulas:
That last one is the most important number on the sheet. It counts every application where the follow-up date has passed and you haven't acted. If that cell reads anything above zero, that's your to-do list for today.
Format the response rate cell as a percentage: Format → Number → Percent.
Step 6: Add an Overdue Highlight
One more conditional formatting rule makes overdue rows impossible to ignore. Select column F, choose Conditional formatting → Custom formula is, and enter:
=AND(F5<TODAY(), F5<>"", $E5="Applied")
Set the fill to red. Now any application you've let go past its follow-up date turns red on sight.
Get the finished template: Download
How to Build a Job Application Tracker in Notion
To build a job application tracker in Notion, create a database, add properties matching the ten essential columns, then create a Board view grouped by Status and a filtered view showing only applications that need action.
Notion's advantage over Sheets is views. The same data can appear as a kanban board, a calendar of upcoming follow-ups, and a filtered action list, without duplicating anything.
Step 1: Create the Database
On a new page, type /table and select Table view. Name it "Job Applications."
Step 2: Add Your Properties
Property type matters more here than it does in Sheets, because it determines what views you can build later.
Set Status as a Select property with the same seven options from the Sheets build. Notion lets you assign a color to each option directly, which handles your color coding without a separate formatting step.
Using Files & media for Resume Version means you attach the actual file to the row. When a recruiter calls, the exact resume you sent is one click away.
Step 3: Add a Board View
Click + New view → Board, and group by Status.
This is the reason to choose Notion. Your entire pipeline becomes a kanban board, and moving an application from Applied to Interviewing is a drag rather than a cell edit.
Step 4: Add a Calendar View for Follow-Ups
Click + New view → Calendar and set the date property to Next Follow-Up.
Every follow-up you owe now appears on a calendar. Nothing disappears into a spreadsheet row you forgot to scroll to.
Step 5: Build a "Needs Action" View
This is the Notion equivalent of the overdue-follow-ups dashboard cell, and it's the single most useful view in the whole setup.
Create a new Table view named "Needs Action," then add two filters:
- Status is Applied
- Next Follow-Up is before Today
Everything in this view is an application you've let slip. Open Notion, check this
Get the finished template: Notion Template
Google Sheets vs. Notion vs. a Tracker Tool
The honest answer is that the tool matters far less than the fields and the habit. A messy spreadsheet you update every day beats an elegant Notion dashboard you abandoned in week three.
The Easiest Option: AIApply's Free Job Application Tracker
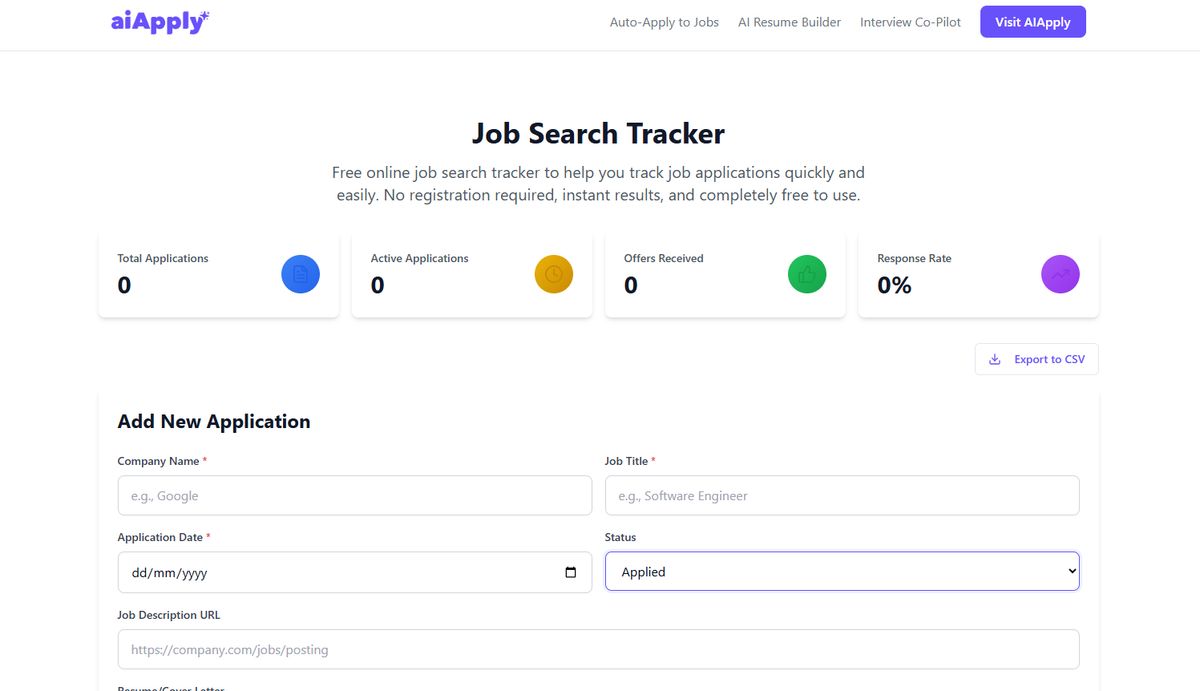
If you'd rather not build anything, AIApply's Job Search Tracker is free and requires no signup. You open the page and start adding applications.
What you get without configuring anything:
- A dashboard that calculates itself. Total applications, active applications, offers received, and response rate update as you add rows. No formulas.
- Resume attachment per application. Upload the exact PDF or Word file you submitted, so "which resume did I send?" is never a question.
- AI-generated follow-up emails. Generate a follow-up tied to the specific application rather than starting from a blank draft. If you want to write your own, the follow-up email generator covers other scenarios.
- Status and date filters. Sort and filter without building views.
- CSV export. Your data stays portable. Nothing locks you in.
- Local storage. Your applications are stored in your browser, not on a server.
Before you submit anything through your tracker, it's worth running the resume through an ATS checker to confirm it clears the first automated filter.
How to Keep Your Tracker Updated
A tracker fails from neglect, not from bad design. The cadence below is what keeps it alive.
When you find a job: Save the URL, save a PDF of the description, log company and role, and decide within 48 hours whether to apply, defer with a deadline, or skip.
Before you apply: Choose your resume version and log it. Draft a matched cover letter. Check the salary range and your deal-breakers. Note any referral you have.
Immediately after applying: Set status to Applied. Record the date and resume version. Confirm your follow-up date populated.
After any employer contact: Update the status and last contact date. Add the contact name and what was discussed. Set your next action.
After an interview: Log the interviewers and the questions they asked. Log your strongest and weakest answers. Send a thank-you note within 24 hours. Set your next follow-up date.
Every Sunday, fifteen minutes: Archive rejected and timed-out rows. Clear your overdue follow-ups. Check your response rate. Identify where you're stalling.
The Six Rules That Define a Working Tracker
Every active application has a next action. Every submitted application has a resume version logged. Every interview has notes. Every follow-up has a date. Every closed opportunity has an outcome. Every week has a metrics review.
Six rules. If your tracker satisfies all six, it's working. If your Next Follow-Up column is empty across more than half your active rows, it isn't.
You also need an archive rule, or your active view fills with dead weight. A reasonable default: no human contact within thirty days of applying moves to Ghosted. This isn't an emotional judgment. It's cleanup.
How to Read Your Tracker Data
Your tracker's real value shows up around week four, when you have enough rows to see a pattern. Your search is a funnel, and the shape of that funnel tells you exactly what to fix.
This is also why the Source column earns its place. Once you have thirty or forty rows, calculate your response rate per source. Most people discover they're spending the most time on their worst-converting channel.
One finding worth knowing before you optimize for volume. BLS analysis of Current Population Survey data found that among jobseekers who sent up to 80 applications, applying to more jobs was associated with a higher likelihood of receiving an offer. But the group that applied for 81 or more applications was less likely to have received an offer than the group that applied to 21 to 80. The researchers suggest this may be because jobseekers applying at very high volume are less targeted in their process.
Volume isn't the problem. Unfocused volume is. Your tracker's Fit Evidence column is how you stay honest about the difference.
Frequently Asked Questions
How many applications does it take to get an interview?
There's no universal ratio, and your own data is a better guide than any average. BLS analysis of a 2018 Current Population Survey supplement found that jobseekers unemployed less than five weeks averaged 10.32 applications and 1.63 interviews over a two-month period, while those unemployed 15 to 26 weeks averaged 17.22 applications and 2.38 interviews. The same analysis found that jobseekers with at least one interview had roughly a 37% chance of having received a job offer, compared with about 10% for those with no interviews.
Track your own application-to-interview ratio for a month. That number is worth more to you than any national figure.
Is a spreadsheet enough for tracking job applications?
For most job seekers, yes. Spreadsheets are free, flexible, easy to share with a career coach, and well suited to funnel metrics and formula-based follow-up reminders. A dedicated tool adds value when you want zero setup, automatic dashboard calculations, or resume files attached per application. The fields you track and the habit you build matter more than the software.
When should I follow up after applying for a job?
Wait one to two weeks after applying unless the employer gave you a specific timeline. After an interview, send a thank-you note within 24 hours, then check in five to seven business days later if you haven't heard back. If the employer named a decision date, follow up one to two business days after it passes.
How do I avoid applying to the same job twice?
Use the Job URL column. Before applying to anything new, search your tracker for the URL. Also check the company name plus job title together, since roles get reposted under slightly different titles. In Google Sheets, this conditional formatting rule on column D flags duplicates automatically:
=COUNTIF($D:$D, D5)>1
Should I track every application or only the ones that respond?
Track every application. For non-responsive ones, a lightweight record (company, role, date, status, source) prevents duplicates and feeds your funnel math. For applications that advance, track deeply: resume version, contacts, interview notes, follow-up history.
What's the difference between a job application tracker and a job search tracker?
A job application tracker manages individual applications: what you sent, where it stands, what's next. A job search tracker is broader, covering target companies you haven't applied to yet, networking conversations, and weekly goals. Start with the application tracker. Expand once the pipeline piece is working.
Start With the Template, Not the Theory
The best job application tracker is the one you open every morning. Not the most elegant one, and not the one with the most columns.
Copy the Google Sheets template or duplicate the Notion version, add your first five applications tonight, and check your overdue-follow-ups cell tomorrow. Or skip the build entirely and use AIApply's free Job Search Tracker, which handles the dashboard, the resume attachments, and the follow-up emails without any setup.
Once your tracking is running, AIApply's resume builder and auto-apply handle the volume side of your search, so your tracker fills up with applications that were worth making.